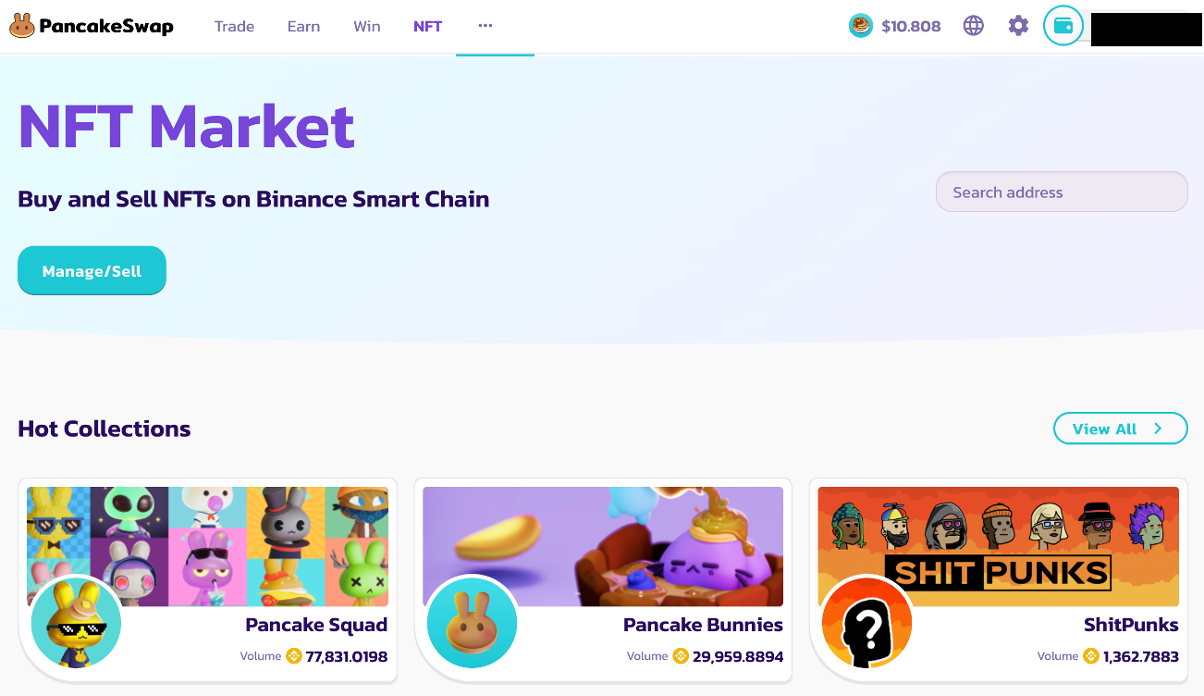
What is PancakeSwap?
PancakeSwap is a decentralized, Binance Smart-Chain-based exchange. The platform enables users to swap BEP-20 tokens via liquidity pools. If you’re not familiar with the concept of liquidity pools, then you might want to have a quick read of our liquidity pools article
In brief, liquidity pools (LPs) are made up of a collection of tokens that are used to facilitate processes such as lending and trading on decentralized platforms. Individuals who supply LPs with tokens receive rewards.
It’s also possible to stake tokens (i.e. lock up tokens to support a blockchain network’s security) on PancakeSwap in exchange for rewards.
This tutorial will show you how to connect your crypto wallet to PancakeSwap and how to use all of the main features on the platform.
Connecting your Wallet
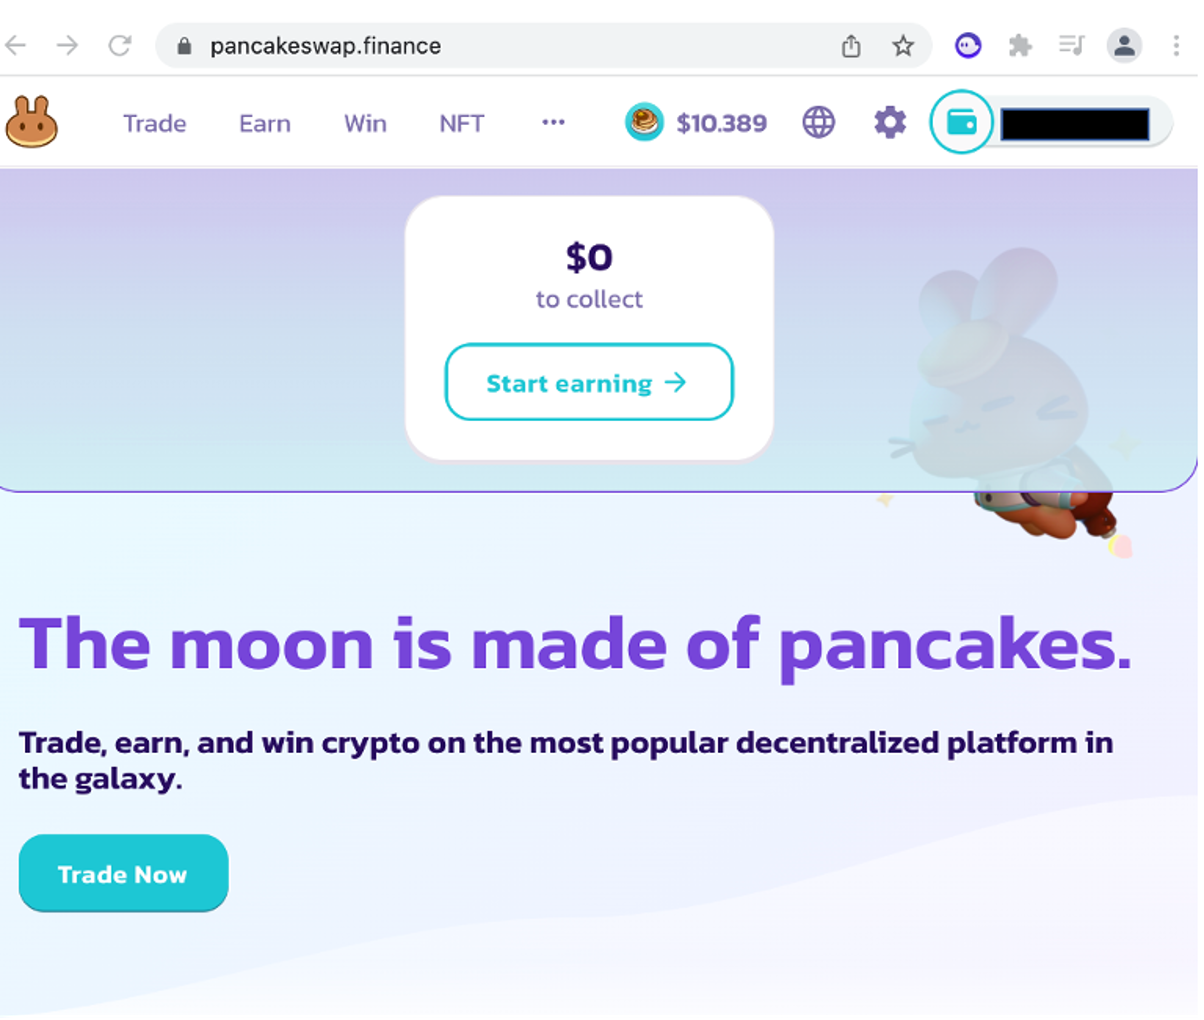
To start, head over to PancakeSwap’s website, ‘pancakeswap.finance’.

The first thing you’ll want to do is connect up your crypto wallet. PancakeSwap currently supports eight different wallet options, including MetaMask, WalletConnect, and Trust Wallet.
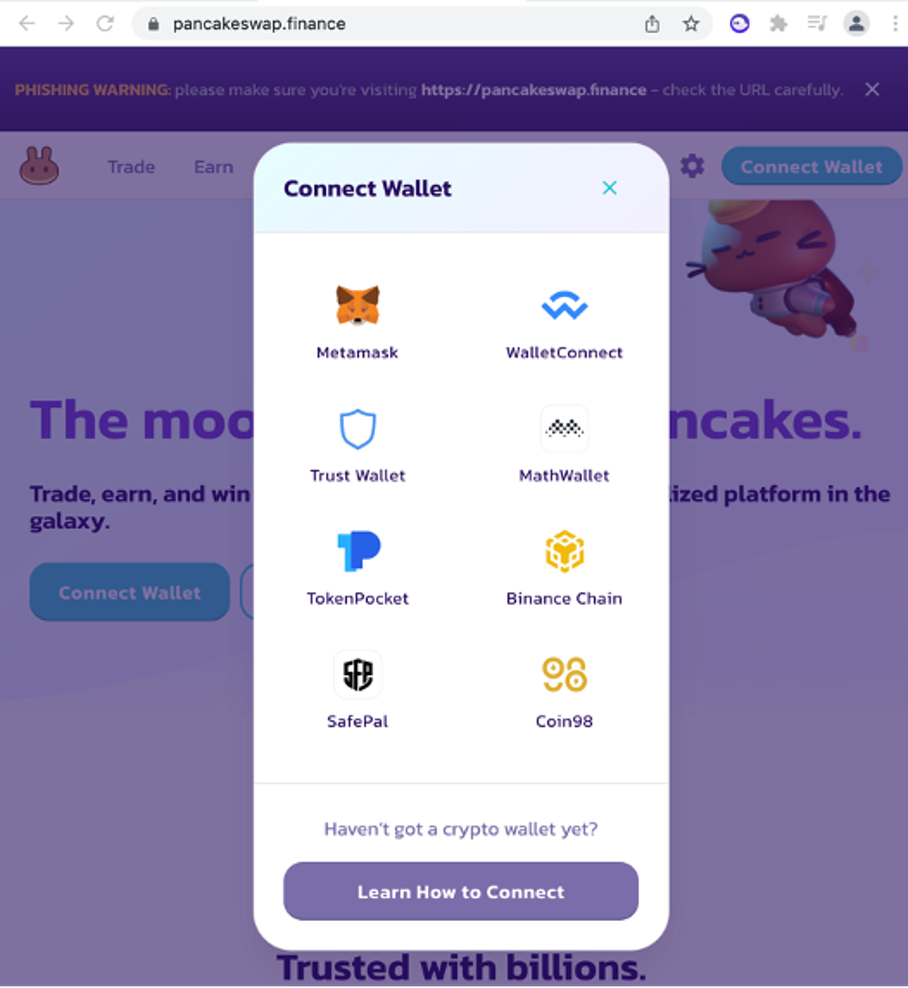
For this tutorial, we’ll be showing you how to connect u a MetaMask wallet to PancakeSwap, but the process is straightforward for all of them.
If you don’t already have a crypto wallet, then you will need to set one up. We currently have a tutorial out on how to set up a wallet with MetaMask, but we plan to publish more tutorials for different crypto wallets soon.
Once you select your crypto wallet, PancakeSwap will take you through a couple of steps where you’ll be prompted to grant permission to connect the wallet.
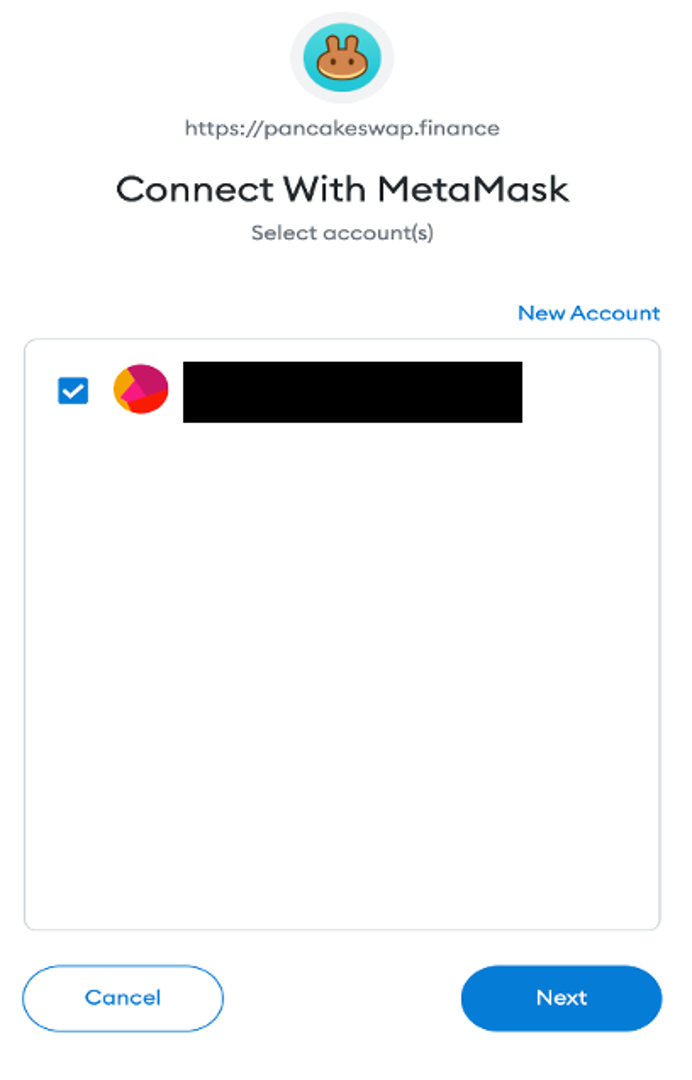
Note that because MetaMask is Ethereum-based, you will also need to grant permission for Binance smart chain capabilities to be added to your wallet.
You need to do this in order to be able to use Binance smart chain tokens (BET-20 tokens), which are the tokens used on PancakeSwap.
To switch back to the Ethereum network, all you have to do is go to your MetaMask wallet’s mainpage and click on the ‘Binance Smart Chain’ tab and then select ‘Ethereum Mainnet’.
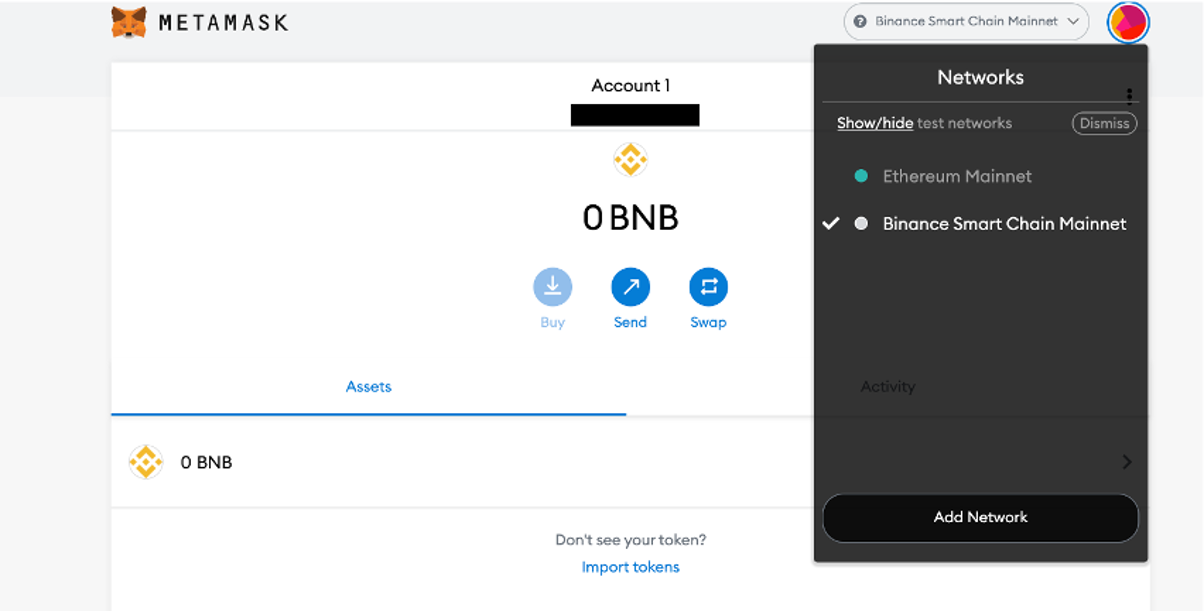
Once you have this done, you should now be able to see your wallet icon in the top right hand corner of PancakeSwap’s home screen.
Adding Binance (BNB) tokens
The next thing you’ll want to do is add some BNB coins to your MetaMask wallet. BNB coins are what you will need to pay for transaction fees on PancakeSwap. BNB coins can be bought from exchanges such as Binance.
If you don’t already have an account with an exchange that supports BNB coins, then you will need to set one up. We have a tutorial on how to set up a Binance account coming in the next few weeks, so be sure to keep an eye out.
If you already have an account with one of these exchanges, then you can go ahead and purchase some BNB and send these coins to your MetaMask wallet.
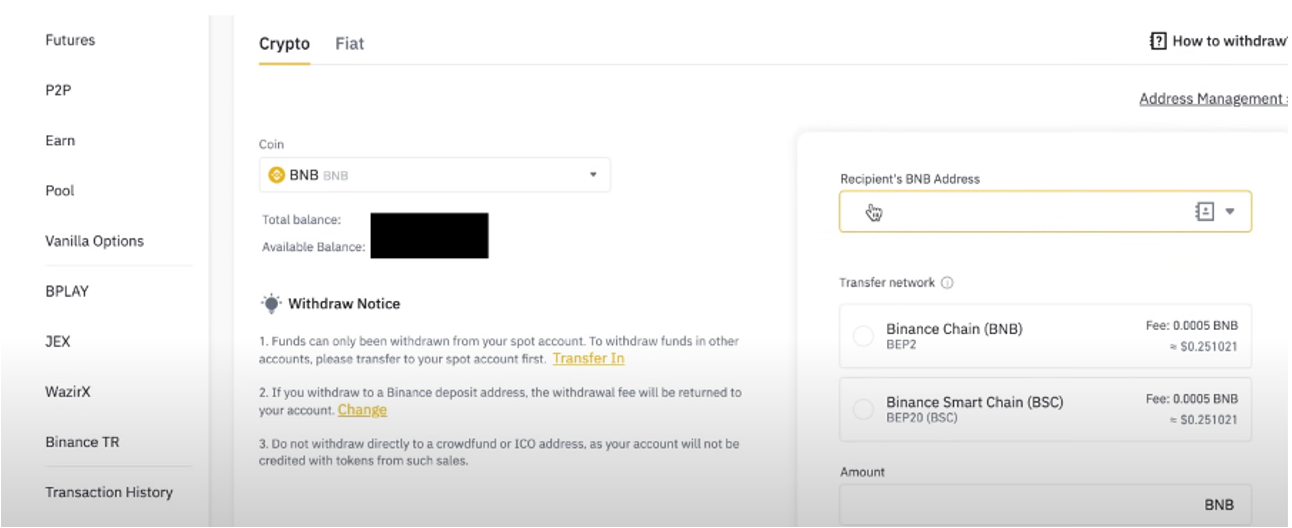
Note that it is really important that you enter the correct recipient address and select the correct transfer network as if you make a mistake here, you risk losing your tokens.
To copy your MetaMask address, click on your account name at the top of your wallet’s main page.
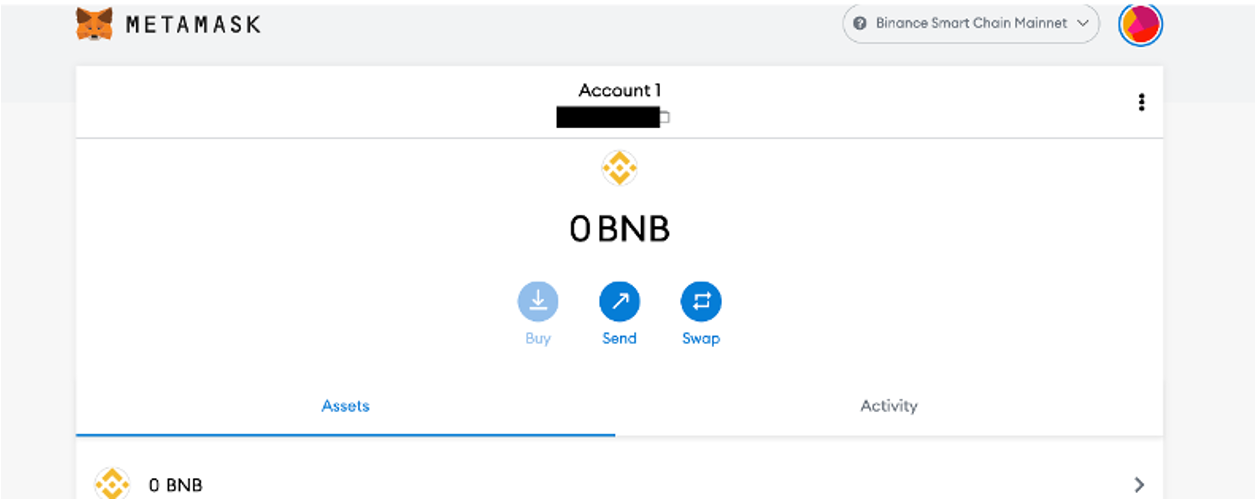
You can then paste this directly into the ‘recipient’s BNB address’ section. Select the Binance Smart Chain (BSC) as your transfer network.
Once you confirm the transaction, your BNB coins should be visible in your MetaMask wallet.
Exchanging BEP-20 tokens.
If you want to swap one BEP-20 token for another, then click on ‘trade’ followed by ‘exchange’ at the top left of your PancakeSwap screen.
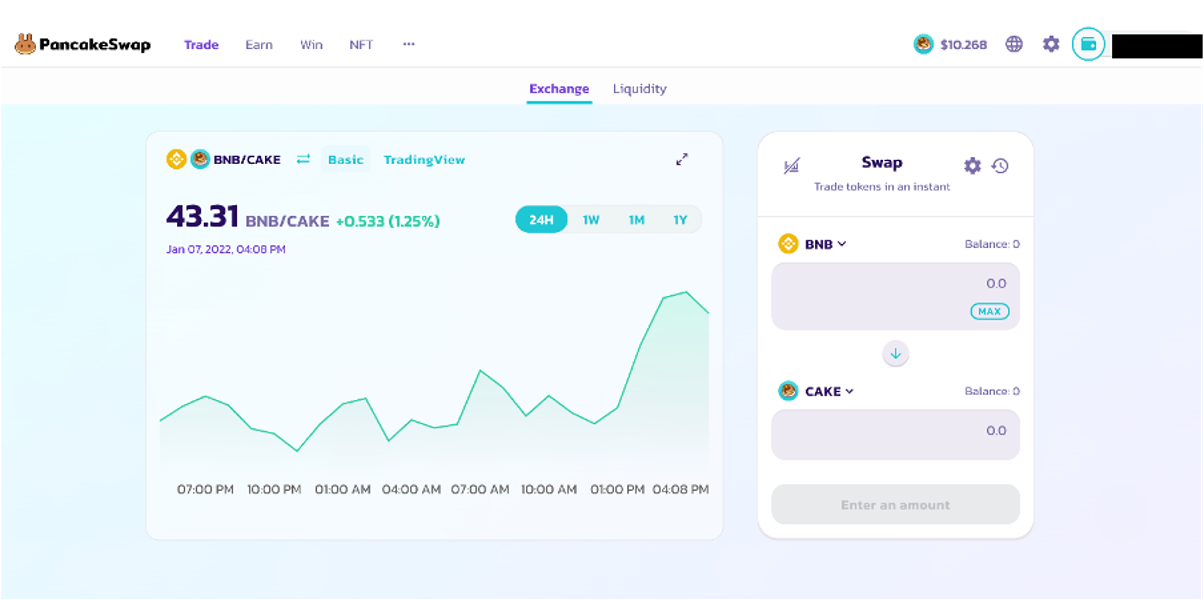
Next, you can enter the amount and type of token that you want to swap as well as the type of token you want to swap it into. You can also do this the other way around (i.e. type in the quantity of the token that you want to receive, and you will be shown the corresponding amount of the original token you will have to swap).
Once you have this done, you’ll be able to view some of the transaction details.
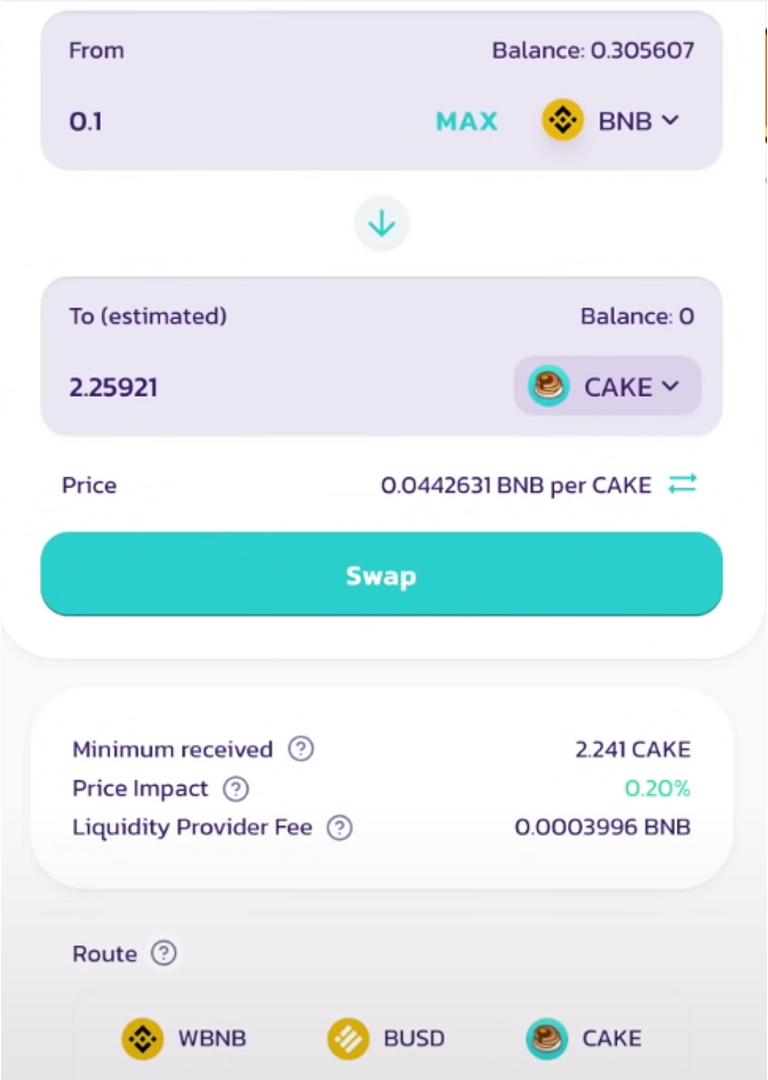
Because PancakeSwap uses liquidity pools to swap tokens, the number of tokens you receive from an exchange can vary from the time you start the transaction to the time it is processed.
The ‘price impact’ is simply an estimation of the impact that this transaction will have on the liquidity pool.
The ‘minimum received’ value is the lowest amount of tokens you can expect to receive from the swap. If you are exchanging small amounts, this value generally won’t be that different from the original quote.
If you are exchanging large amounts, then you can click on the settings tab at the top of this pop up screen to set what is called a slippage tolerance.
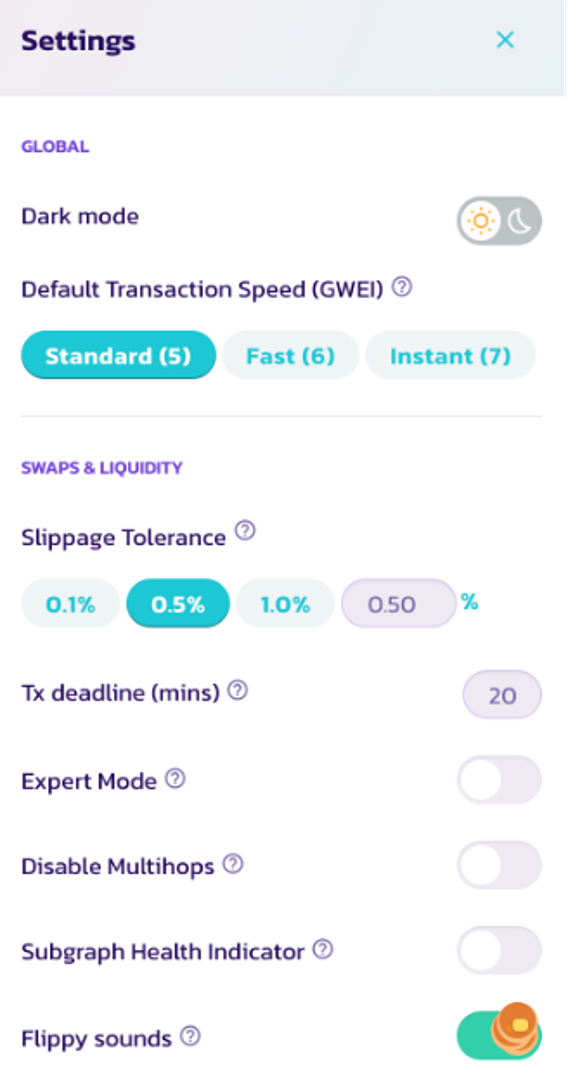
A token’s value is constantly influenced by supply and demand and because of this, the price of the swap can vary slightly from the time you begin the transaction to the time it is processed. The slippage tolerance is used to represent the level of price fluctuation you are ok with.
In this section, you can also alter the transaction speed. You will have to pay a higher transaction fee for a higher speed.
When you click on ‘swap’ another pop up screen will appear where you can review the transaction details again.
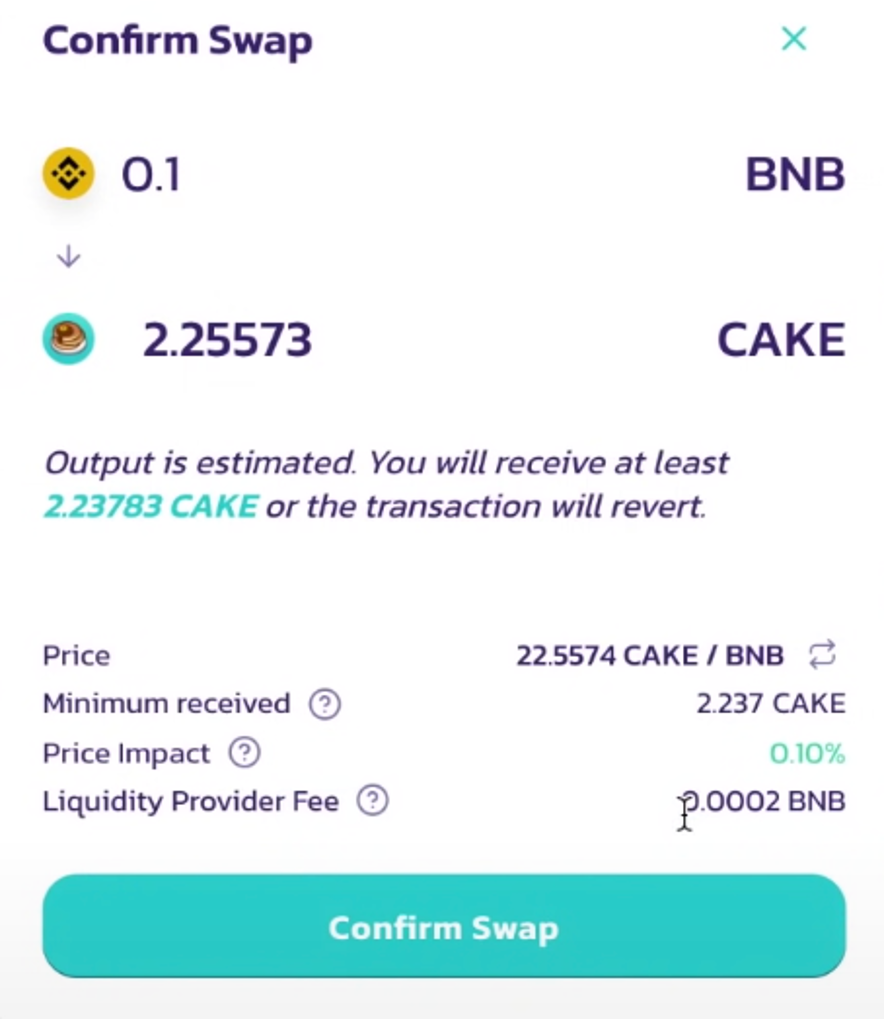
Once you click on ‘confirm swap’, you’ll be prompted to confirm the transaction in your MetaMask wallet. You’ll then have the option to view this transaction on the Binance Smart Chain.
Your new tokens should appear in your wallet shortly!
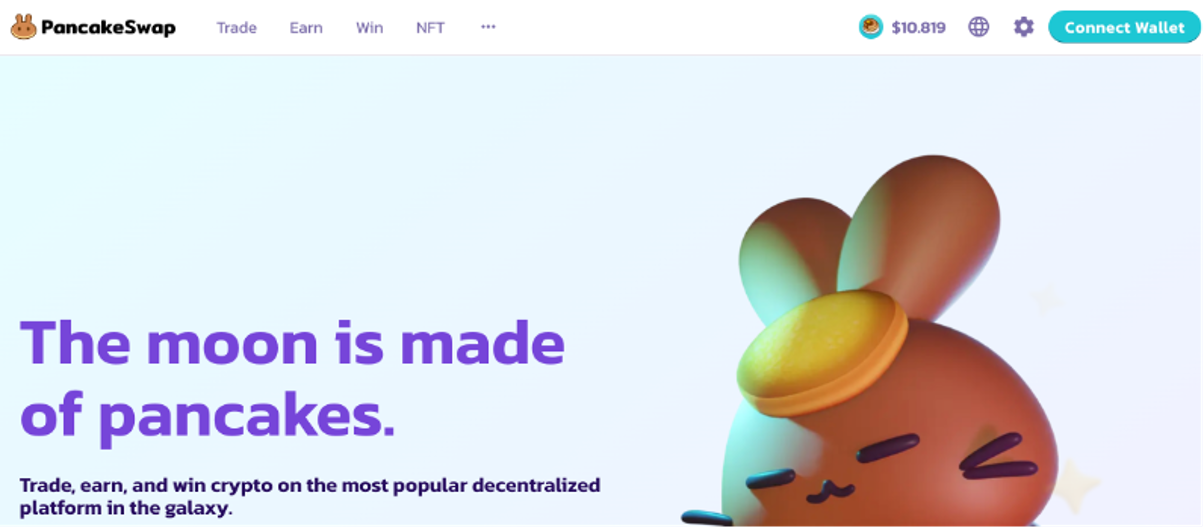
Note that sometimes your wallet can disconnect from PancakeSwap. To reconnect, just click on the ‘connect wallet’ button.
Adding tokens to a liquidity pool
To provide liquidity, start by clicking on ‘trade’ followed by ‘liquidity’ on the top left of your screen. Next press the ‘add liquidity’ button.
Note that you’ll need to provide two different types (i.e. a trading pair) of tokens to the liquidity pool.
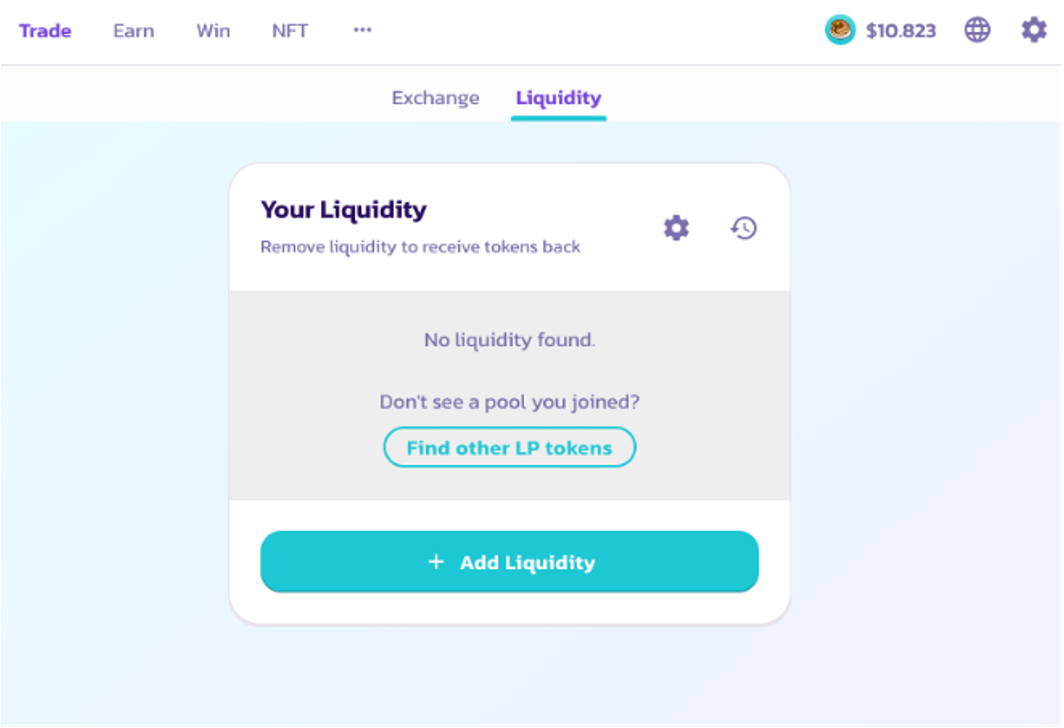
On the following screen, you can choose the tokens that you want to put up for liquidity. PancakeSwap requires you to add these tokens in the proportion that they currently exist in the liquidity pool (LP).
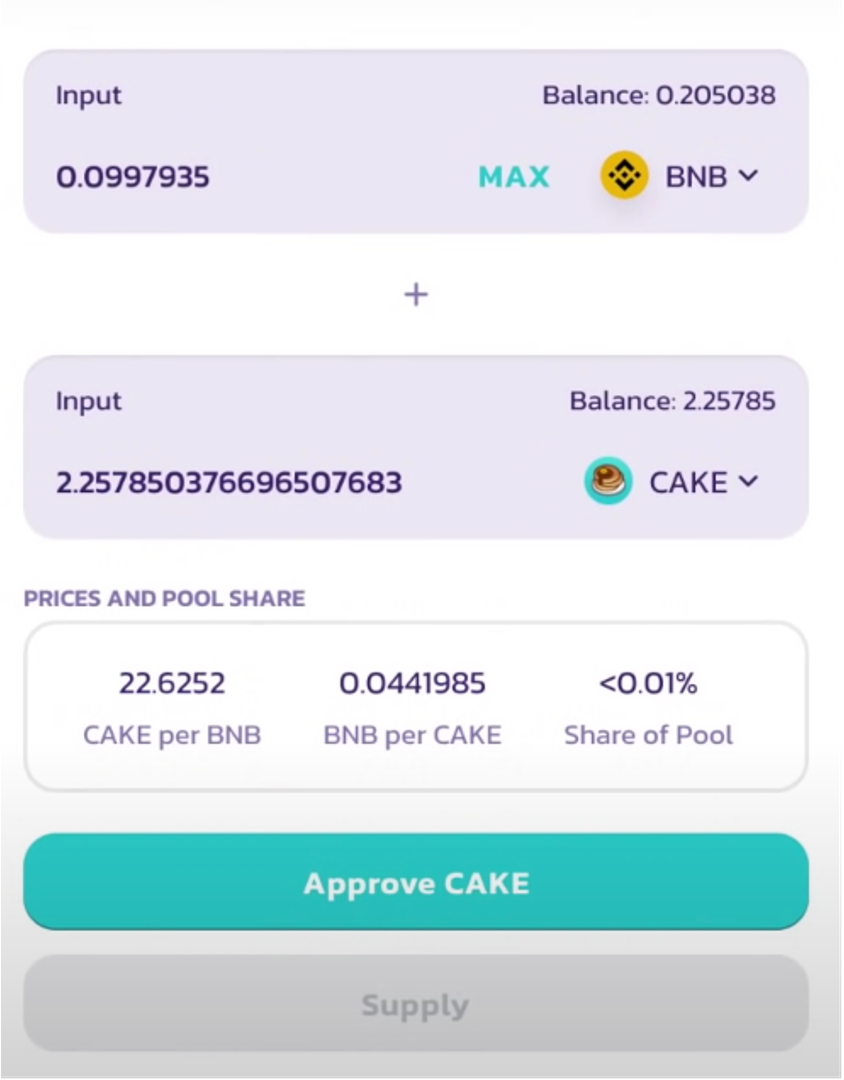
If you want to add the entire amount of a token you own, press ‘max’, and the corresponding amount of the other token you will need to provide will be automatically calculated.
Otherwise, simply enter the amount of one token that you want to add, and the corresponding amount of the other token you will need to provide will be automatically calculated.
When you click ‘approve’, you will be prompted to approve the transaction between your wallet and PancakeSwap. Here you will also be charged a small transaction fee.
In the ‘prices and pool share’ section, you will see the ratio of one token to another that is currently in the LP, as well as an estimate of the percentage share of the pool that you will have once the transaction is processed.
Following this, click on ‘supply’ to review the transaction details.
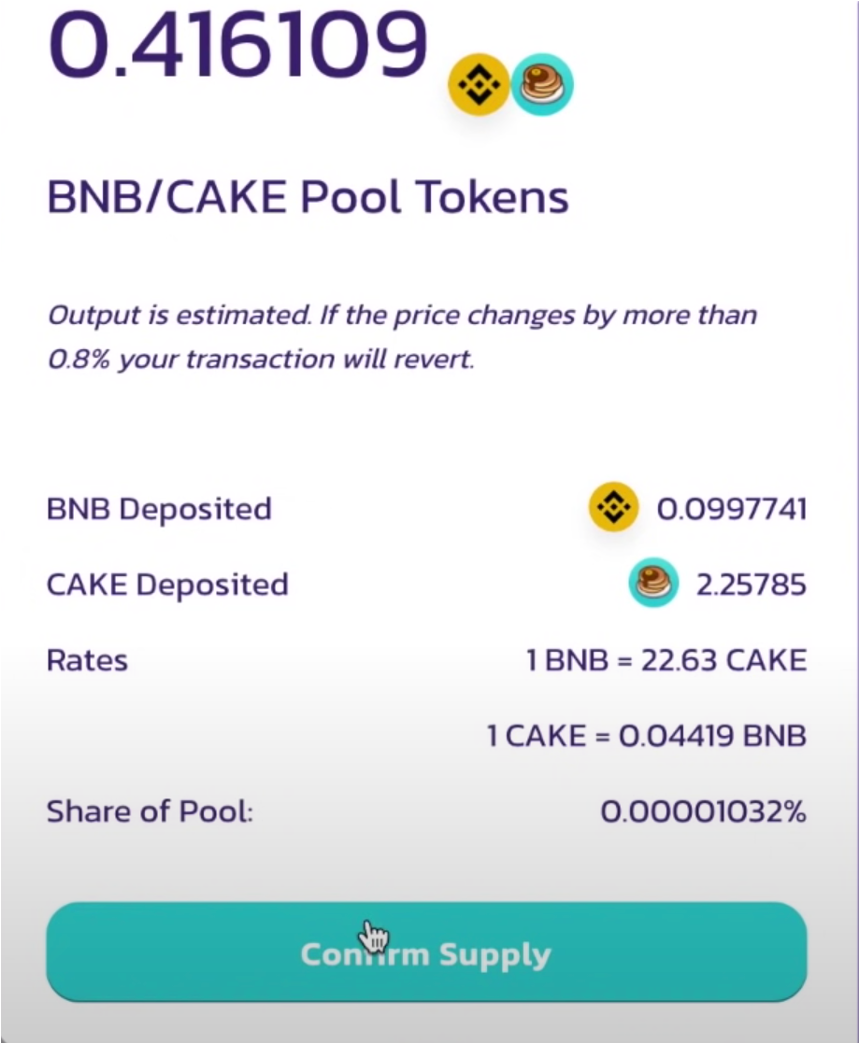
Once you click ‘confirm supply’, you will be prompted to confirm the transaction in your wallet again. After this, your tokens will be added to the liquidity pool!
When you click ‘close’, you’ll be able to see the amount of liquidity provider or LP tokens you currently hold. The amount you receive will be proportionate to the number of tokens you have in the liquidity pool.
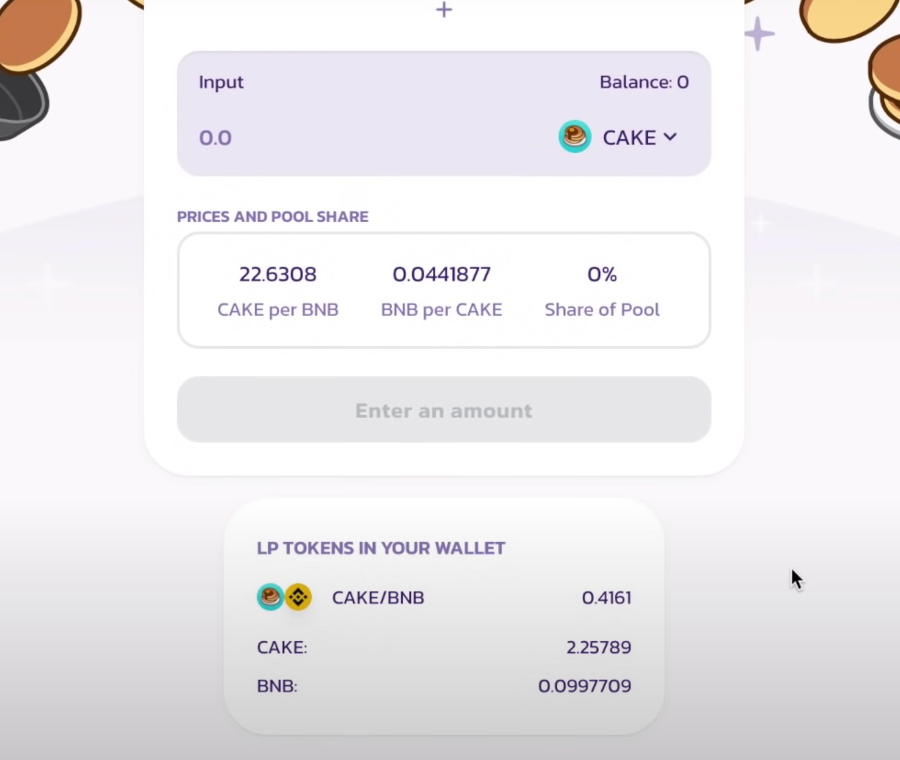
Now when you click ‘trade’ followed by ‘liquidity’ at the top of your screen, you’ll be able to see the liquidity that you are providing.
You can withdraw your tokens from the LP at any time. When you withdraw, you will receive your share of the LP plus any additional tokens earned from trading fees. PancakeSwap charges a 0.2% transaction fee, 0.17% of which is allocated to liquidity providers.
Note that the amount of tokens you receive back may not be equal to the amount that you initially provided due to impermanent loss. This is an important risk to consider.
Staking Liquidity Provider tokens
Once you have your LP tokens, you can stake them in ‘farms’.
To do this, click on ‘earn’ followed by ‘farms’ at the top of your screen.
On the following page, you’ll need to select the token pairing that you received LP tokens for.
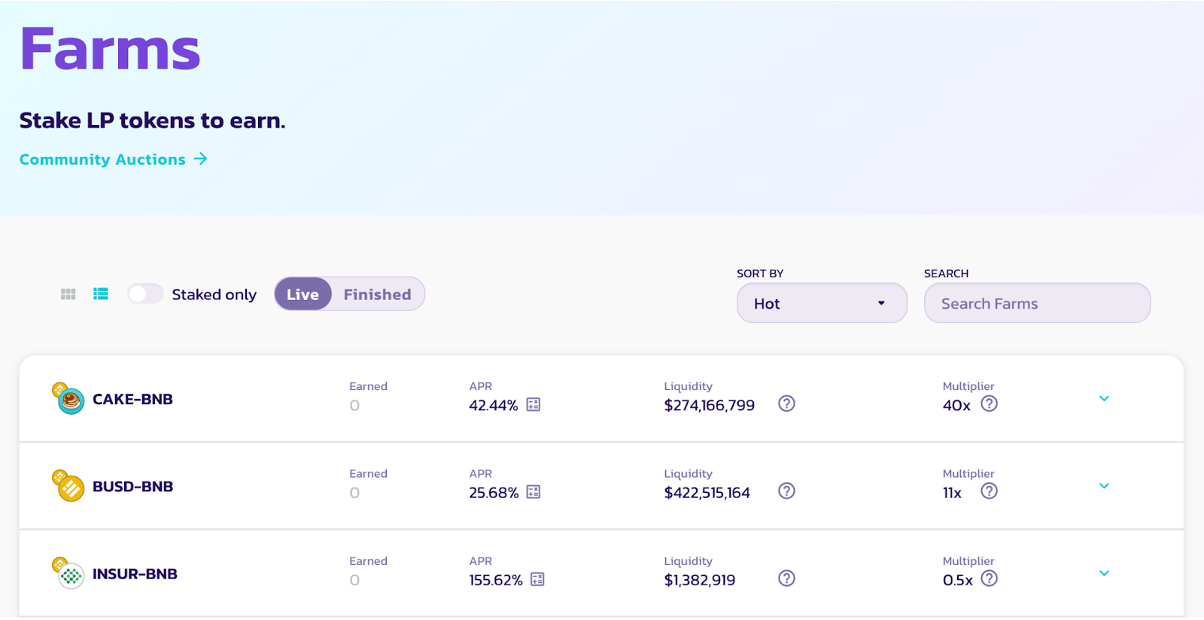
Next to each token pairing, there will be an ‘APR’ or annual percentage rate figure (i.e. the yearly returns rate). You can access additional information for this token pairing in the drop-down menu. Click the ‘enable’ button.
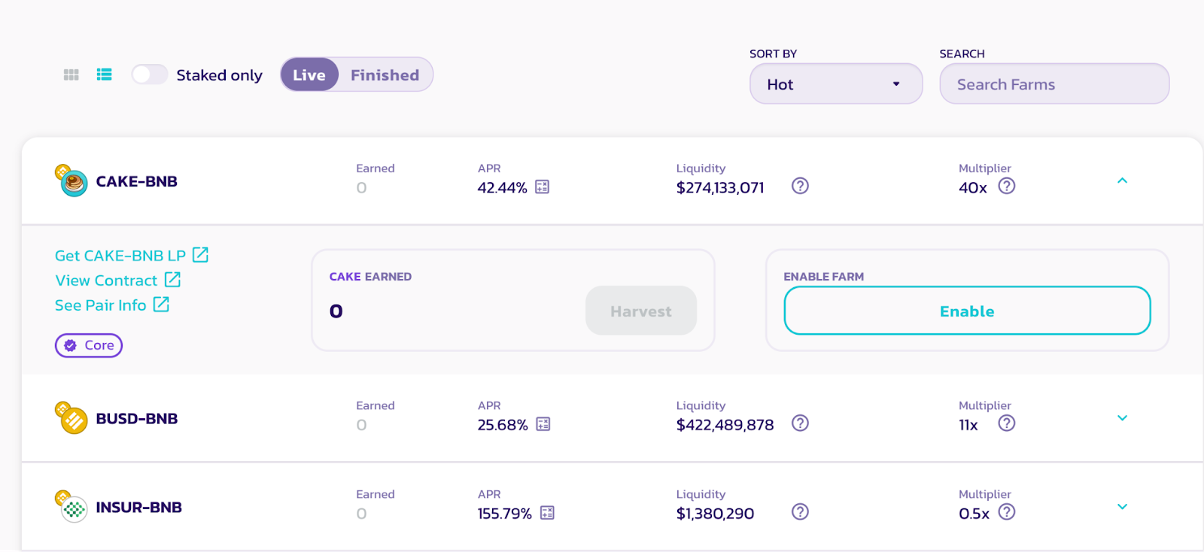
You’ll then be prompted to confirm the transaction in your crypto wallet. You will also have to pay a small transaction fee. After this, click on ‘stake LP’.

In the pop-up screen that appears, you’ll need to enter the amount of LP tokens you want to stake. Your LP token balance will be visible on this screen.
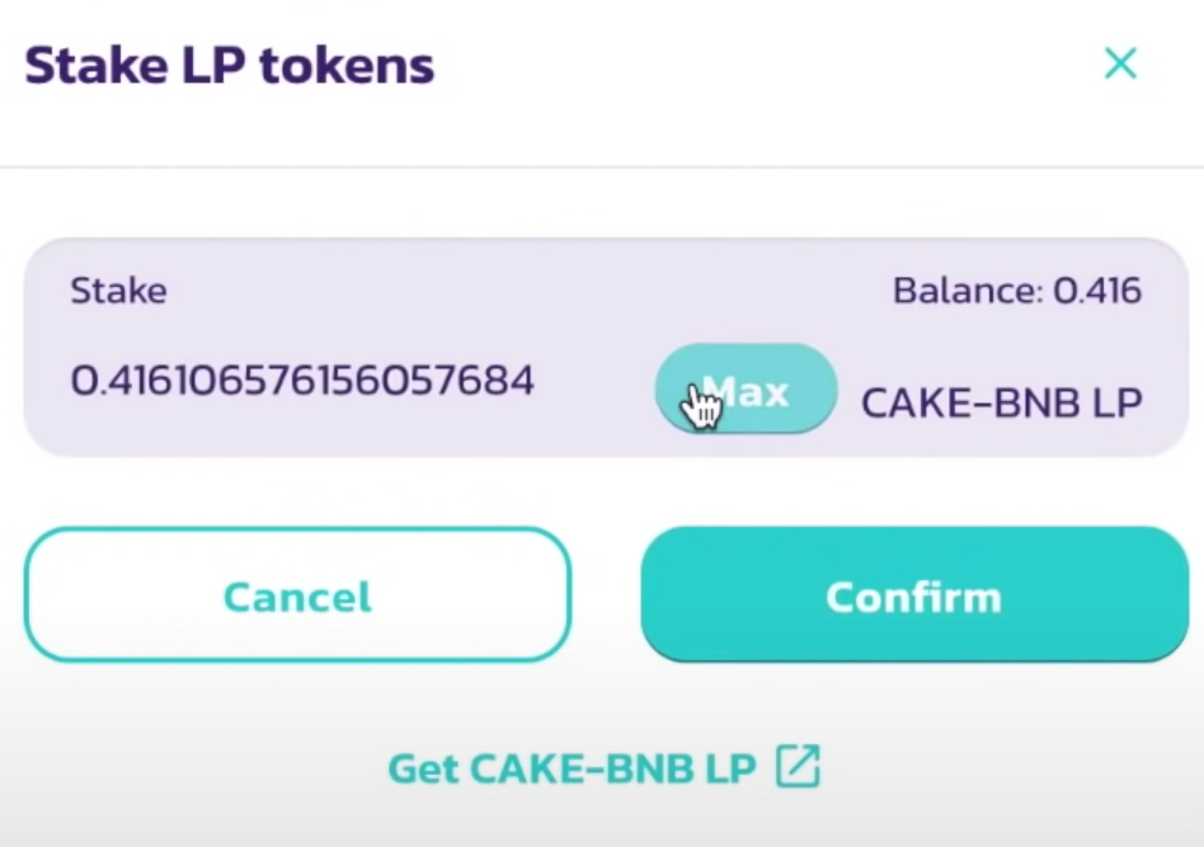
If you want to stake all of your tokens, press ‘max’. When you click ‘confirm,’ you will be asked to confirm the transaction again in your wallet.
Once this is done, your LP tokens will have been staked.
Your LP tokens will now begin to earn CAKE tokens. This will be visible in the drop-down menu for the token pairing in the ‘farms’ section. Here you can also harvest any CAKE tokens that you earn.
Note that each time you harvest your tokens, you will have to pay a small transaction fee.
Staking tokens in Syrup pools
Syrup pools are where you can stake a range of tokens other than LP tokens. There’s a whole host of different syrup pools to choose from, each offering different types of rewards.
We’re going to use one of the main pools, the CAKE pool (used to stake and earn CAKE tokens), as an example.
To start, click on ‘earn’ followed by ‘pools’ at the top of your screen.
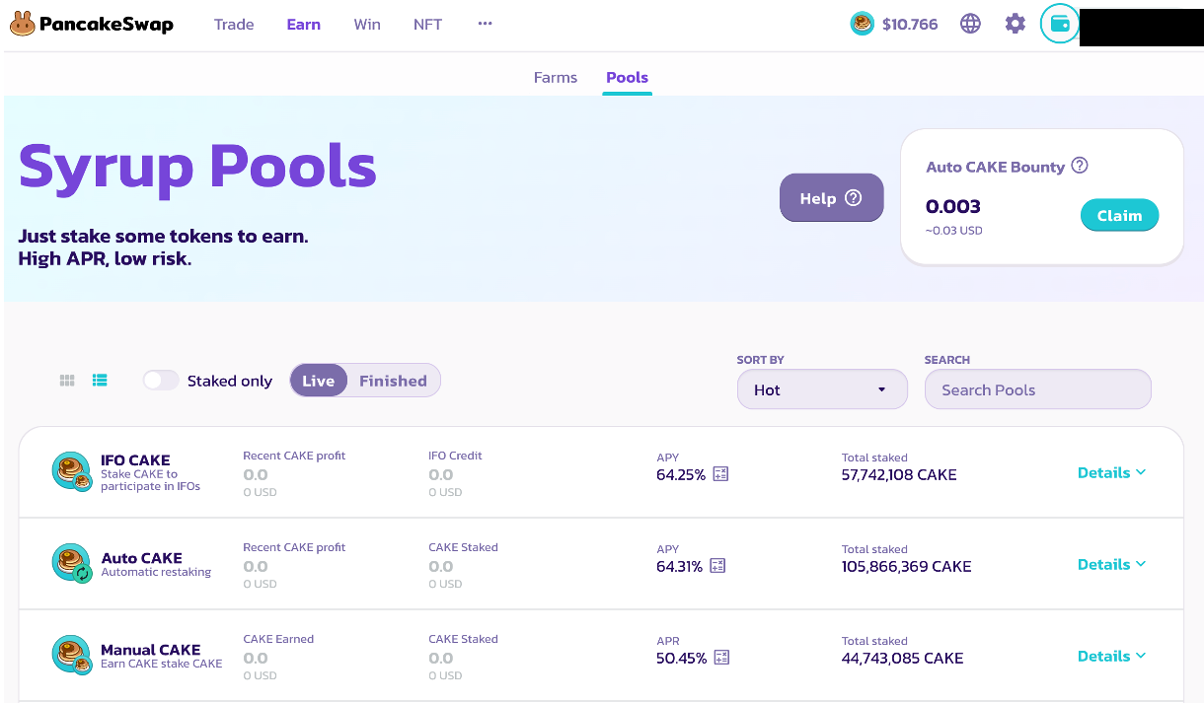
Next, you will need to decide whether you want to stake using the Auto CAKE pool or the Manual CAKE pool. The Auto CAKE pool will automatically harvest and re-invest any CAKE you earn. Whereas you will need to do this yourself if you go with the Manual CAKE pool.
Once you have decided, click ‘enable pool’ in the drop-down menu. Again, you will need to confirm this transaction in your wallet and pay a small transaction fee.

To add your CAKE, click on the ‘+’ icon. In the pop-up screen that appears, your current CAKE balance will be displayed.
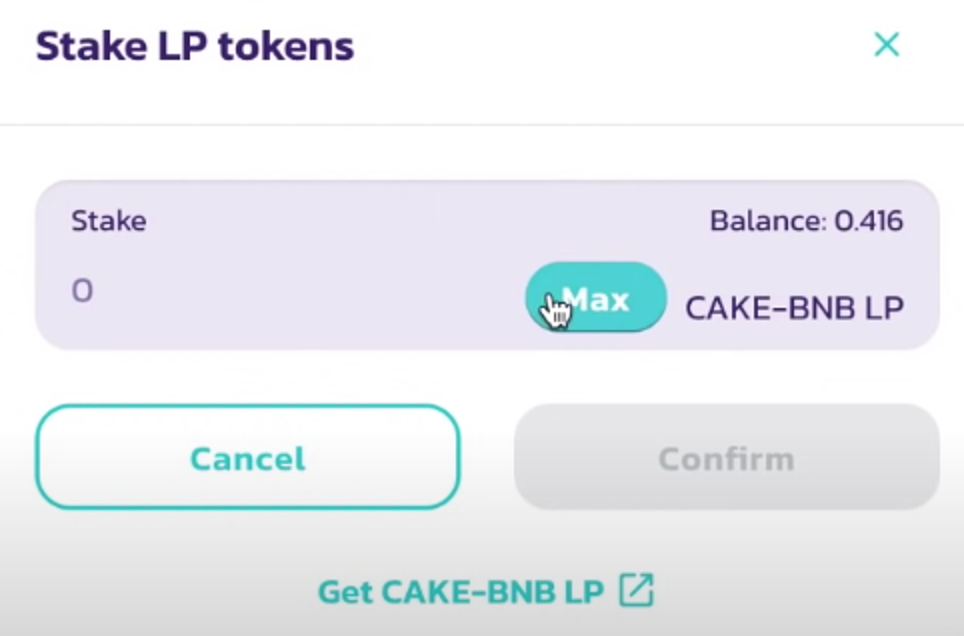
Simply enter the amount of CAKE you want to stake and then press ‘confirm’. Your tokens will now be staked!
Lotteries
PancakeSwap runs regular lotteries that you can take part in. To buy a ticket for one of these lotteries, click on ‘win’ at the top of the screen, followed by ‘lottery’.
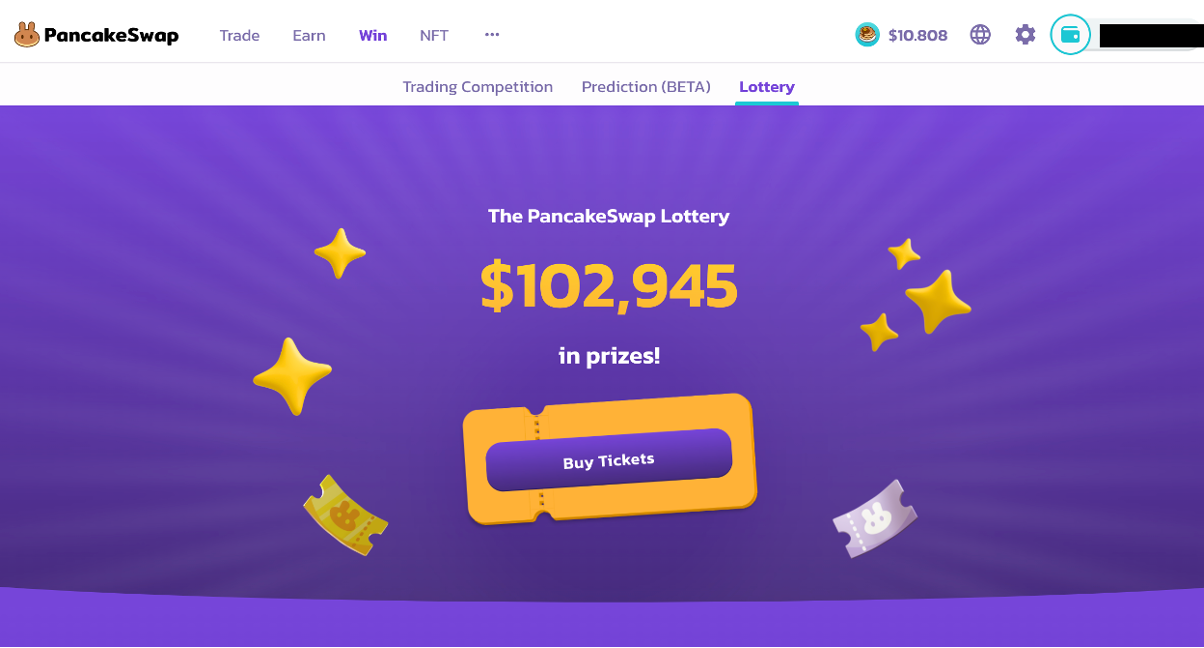
Here, you can use your CAKE tokens to buy a ticket. As always, you will have to approve this transaction in your crypto wallet.
Your ticket will consist of four numbers. If two, three, or all of these numbers match the winning numbers, you’ll receive a prize!
You can also earn rewards via trading and prediction competitions.
PancakeSwap NFT’s
PancakeSwap also has its own NFT collections, which will sometimes be used as lottery prizes. It’s also possible to buy and sell these NFT’s on PancakeSwap.
